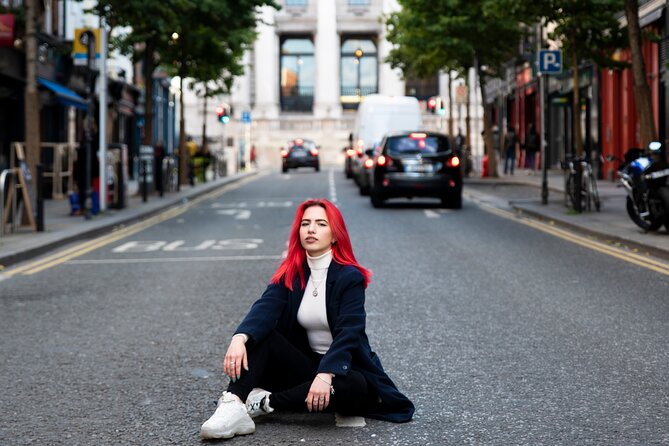
A camera makes Dublin look different. This photography-themed walking tour turns everyday landmarks into teachable moments, with a local influencer-style approach and practical tips you can use right away. You’ll work through several iconic stops, then finish with two surprise locations that change based on weather and what’s happening in the city.
I love that the lessons are built around your phone and real shooting situations, from nature-style framing in St Stephen’s Green to street-light timing on Grafton Street. I also like the Instagram focus, including filters and hashtag strategy, so your photos don’t just look good on your camera roll.
One possible drawback: you do need to bring your own phone (camera gear isn’t included), and it’s a walking tour, so plan for steady moving for about 90 minutes.
In This Review
- Key things to know before you go
- Starting at Fusiliers’ Arch: a 90-minute Dublin photo plan
- St Stephen’s Green and the Shopping Centre: begin with nature and architecture
- Grafton Street: street photography, buskers, and Instagram filters
- Anne Street South: umbrella art, contrast, and posting timing
- Two secret Dublin stops: the fun of not knowing the final frame
- Your guide matters: how Anna, David, Shauna, and Anu teach phones
- What you need to bring, and what you get back in photos
- Should you book PicTours Dublin photo tour?
- FAQ
- Where does the tour start and where does it end?
- How long is the PicTours Dublin tour?
- Is camera equipment provided?
- What price is listed for the tour?
- What group size should I expect?
- Will I get photos after the tour?
Key things to know before you go
- Phone-first photography tips that start simple and get more specific as you walk.
- Instagram skills built into each stop, from filters to hashtag ideas and posting time.
- Iconic Dublin locations plus two secret photo stops the guide keeps under wraps until the end.
- Small group size (max 15), which helps with hands-on guidance.
- You get photos after the tour, not just “go shoot your own memories.”
- Mobile ticket and a meeting point near public transport for an easy start.
Starting at Fusiliers’ Arch: a 90-minute Dublin photo plan

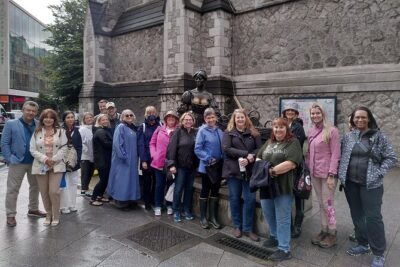
You meet at Fusiliers’ Arch, St Stephen’s Green, and the tour starts at 2:00 pm. It’s a mobile-ticket experience, and the group size is kept to no more than 15 people, which matters because you’ll be actively shooting and getting feedback rather than just following along.
The best part of this kind of tour is that it doesn’t treat photography like a mystery. You’ll get starter technique first, then you’ll apply it on increasingly “harder” subjects: greenery and wildlife-style scenes, indoor architecture, busy street views, then color-and-contrast work on a famous art installation.
Practical heads-up: St Stephen’s Green is surrounded by multiple entrances and nearby lanes that look similar. One review noted some confusion about which side to use. I’d show up a few minutes early and double-check the exact meeting spot near Fusiliers’ Arch before everyone spreads out.
You can also read our reviews of more tours and experiences in Dublin.


St Stephen’s Green and the Shopping Centre: begin with nature and architecture
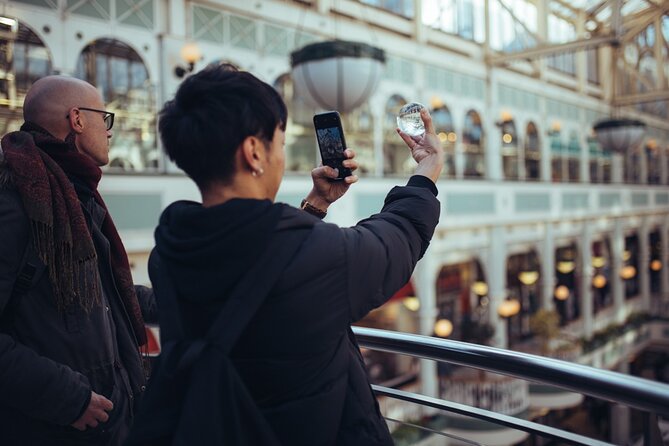
The first stop is St Stephen’s Green, about 15 minutes. This is where the tour usually starts with beginner-friendly technique, the kind that helps you stop aiming at random and start composing. Expect coaching on how to frame nature and wildlife-style shots in a park setting, which is a great way to build confidence because you can practice without the crowd pressure of a major shopping street.
Then you head indoors for another 15 minutes at St Stephen’s Green Shopping Centre. You’re there for the architecture and interior design, plus you’ll learn how to capture interiors without losing your image to harsh lighting. This matters because indoor photos often look flat or overly bright when you use the same phone settings you used outside.
There’s also a Dublin story layer here: this shopping centre is known as a spot tied to U2’s early gigs and has a sense of local trading-hall history. The photography lesson is the main course, but those city stories give your images more meaning when you post them later.
Tip I’d use: if you have an iPhone, pay attention to the guide’s suggestions for photo features. Multiple reviews mentioned learning iPhone tricks that made a real difference in how their photos turned out.
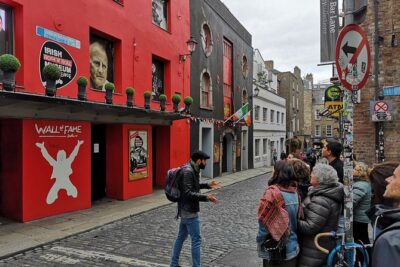
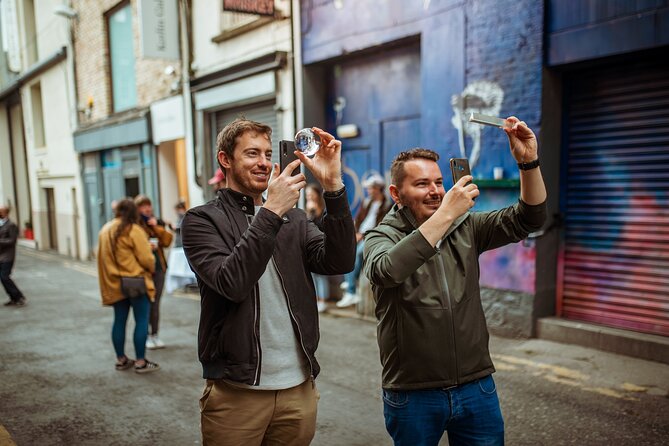
Grafton Street: street photography, buskers, and Instagram filters
Next up is Grafton Street for about 15 minutes. This is one of Dublin’s busiest, most famous streets, and that’s exactly why it’s a smart teaching stop. You’ll work on street photography while learning how to maximize the lighting conditions you’re actually dealing with on the sidewalk.
Lighting is the whole game on a street like this. Busy storefronts, shade from buildings, and people moving through frame can ruin a photo fast. The guide’s job here is to help you keep control: what angle to try, when to shoot, and how to avoid common “everything is blurry” problems.
You’ll also hear buskers here day and night, which adds sound and motion to the scene. It’s a small detail, but it helps you slow down and notice your surroundings. When you’re paying attention, you take better photos.
The Instagram part shows up too: you’ll learn filter choices and hashtag strategy designed to help your posts get discovered. One of the nice things about that is it’s not generic advice. It’s tied to where you are in Dublin and what the images actually show.
Anne Street South: umbrella art, contrast, and posting timing
For about 15 minutes, you’ll move to Anne Street South, known for a back-street photo moment featuring an umbrella art installation. This stop shifts from “capture the scene” to “make your subject pop.” You’ll work on contrast and on boosting color so your shots look like what you saw, not like a dull phone snapshot.
This is also a strong stop for learning how to use available light. The umbrellas can create tricky reflections and highlights, and you’ll get tips for managing brightness and color in a way that looks intentional on Instagram.
Then comes the social-media timing advice: you’ll get guidance about posting time to catch the attention of friends and followers. It’s not something you usually get on standard sightseeing tours, but it’s practical if you actually plan to share your photos instead of letting them sit in a camera roll forever.
If you care about posting, this is the stop where your learning connects most directly to results.
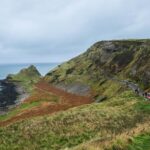
Two secret Dublin stops: the fun of not knowing the final frame
The tour’s final 30 minutes are the mystery payoff: you’ll visit two secret locations for a different angle on Dublin. You won’t know exactly where you’re headed until you’re with the group. The guide uses daily conditions like weather and mentions that locations can change with new art installations and what’s interesting to the group.
This is more valuable than it sounds. If you always chase the same “top 10” postcard spots, you end up with photos that look like everyone else’s. The secret stops are built to help you leave with pictures that feel more personal—like you discovered a corner of the city rather than just walked through it.
You should also tell your guide if you have preferences: for example, specific photography styles or areas you want to learn. Because the final stops can be adjusted, your input can actually affect what you get at the end.

Your guide matters: how Anna, David, Shauna, and Anu teach phones
The tour lives and dies by the guide. The names that stood out across experiences include Anna, Diana, Shauna, Anu, Anupama, and David—and the common thread is patient, hands-on teaching.
A few themes show up again and again:
- Guides helped people who weren’t tech-savvy understand phone features.
- Guides gave feedback when someone messed up a shot, and kept the mood relaxed.
- In at least one case, a solo participant got 1:1 feedback, which is the best-case scenario if your group winds up small.
Even if you’re not a photography person, you’ll likely appreciate how they break things down. Instead of “learn composition,” you’ll hear what to do for the shot in front of you, like how to adjust for light on a busy street or how to frame greenery without turning the image into a blurry green blob.
And yes, you’ll get local storytelling along the way. The mix of street history and quick photography coaching makes the walking feel like progress, not wandering.
What you need to bring, and what you get back in photos

Camera equipment isn’t included. So plan on bringing what you’ll shoot with—most people use a phone, and the guidance strongly suggests that’s the point. Come with your device charged and ready. If you have a case or strap that helps you hold the phone steadily, use it. If your phone runs hot, take a short break and let it cool.
You’re also not just leaving with memories. The experience is designed so you bring home professional-style photos from the trip. Reviews specifically mention receiving a collection of photos taken by the guide in the days after your tour. That’s a big deal for value because it reduces the pressure to nail every single shot yourself.
Think of it this way: you get (1) the skills to take better photos next time, and (2) a safety net of curated results for your vacation album.
One more practical note: the tour is offered in English and is set up so most people can participate. Service animals are allowed, and it’s near public transportation, so you’re not forced into long, complicated transit planning to start.
Should you book PicTours Dublin photo tour?

If you want a fun way to see Dublin and learn how to photograph it without guessing, I think this is an easy yes. The itinerary covers a smart range: park basics, indoor architecture, street-light challenges, and a color/contrast art stop, then finishes with surprise locations. That mix makes it more useful than a normal walk.
It’s also a solid fit if you enjoy Instagram posting and want help beyond filters—especially hashtags and posting time. And if you’re starting from scratch, you’ll get beginner-friendly technique early, before you hit the busier visual scenes.
Book it if:
- You want phone-friendly photography instruction you can use immediately.
- You care about posting, not just sightseeing.
- You’d like a small-group experience and you value getting photos afterward.
Skip it if:
- You hate walking or want a slow, sit-down style tour.
- You’re expecting the tour to supply camera gear (it doesn’t).
One last practical bit: the tour is listed at $0.00 per person. Even if your final confirmation shows any price differences at booking, the structure still looks like strong value because the experience includes guided techniques, multiple stops, and a photo deliverable. Also, free cancellation is available if your plans shift, with refunds tied to cancelling at least 24 hours before the start.
FAQ
Where does the tour start and where does it end?
You start at Fusiliers’ Arch, St Stephen’s Green, Dublin (D02 HX65). The tour ends in Dublin, but the ending point can vary depending on the tour.
How long is the PicTours Dublin tour?
It runs for about 1 hour 30 minutes. The experience covers 5–7 spots during that time.
Is camera equipment provided?
No. Camera equipment is not included, so bring what you plan to shoot with.
What price is listed for the tour?
The tour price is listed as $0.00 per person.
What group size should I expect?
The experience has a maximum group size of 15 travelers/participants.
Will I get photos after the tour?
Yes. The experience highlights and reviews mention that you’ll receive professional-style photos, with one review noting you get a collection of photos taken by the guide a few days later.