REVIEW · DUBLIN
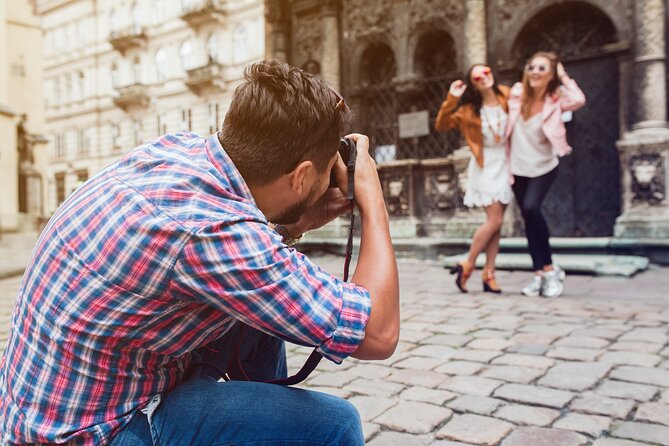
Dublin: Personal Photographer- Travel Photography Experience
Book on GetYourGuide →Operated by Transitan.ie · Bookable on GetYourGuide
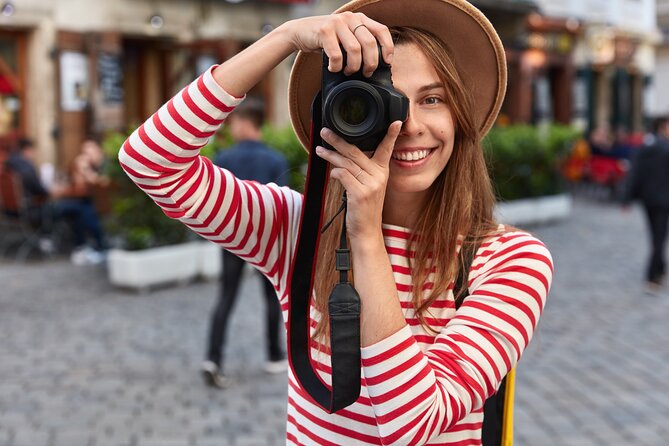
Dublin looks better when someone frames it for you. This 2-hour private photo walk pairs you with a professional photographer and turns Dublin’s biggest landmarks into share-ready shots, not blurry selfies. I really like the promise of professionally edited photos within days, so you get more than just a walk around town. One consideration: it’s not suitable for wheelchair users, so plan accordingly if mobility is a factor.
You’ll start right on O’Connell Bridge and move through classic stops where the light and crowds usually cooperate just enough for great pictures. The pace stays relaxed, and the photographer gives pose ideas plus quick guidance so you don’t feel stiff or awkward. And yes, you’ll get plenty of photo chances around the Temple Bar area, Grafton Street, St. Stephen’s Green, and Trinity College Dublin.
Because it’s a private group for up to 8 people, it feels personal rather than like you’re herded around with strangers. It also means you should think ahead about what you want most: iconic Dublin shots, stylish street photos, or park-and-campus scenes. If you want total spontaneity with no instruction at all, this might feel a bit structured—though that structure is exactly what makes the photos come out clean.
In This Review
- Key Points You Should Know Before You Go
- Why This Dublin Photo Tour Feels Different Than DIY
- Starting at O’Connell Bridge: An Easy Beginning With Big Photo Payoff
- Temple Bar District in Photos: Color, Faces, and Controlled Chaos
- Grafton Street: Where You Get Elegant Street Portraits
- St. Stephen’s Green Park: From Street Energy to Calm Photos
- Trinity College Dublin: Classic Dublin in a Clean Frame
- The Poses and Tips You’ll Actually Use Again
- Price and Value: When $180 Makes Sense for a Private Group
- What You Get at the End: Edited Photos Within Days
- Who This Is For (and Who Might Prefer Something Else)
- Practical Walkthrough of the 2-Hour Flow
- Should You Book This Dublin Photo Experience?
- FAQ
- Where does the tour start?
- How long does the photography experience last?
- How many people are in the group?
- What locations will we visit?
- What happens after the tour with the photos?
- What language is the guide?
- Is it wheelchair accessible?
- Where does the tour end?
Key Points You Should Know Before You Go
- Professional photographer guidance keeps your photos from turning into accidental snapshots
- Edited digital gallery within days, ready for social sharing
- O’Connell Bridge start point makes it easy to meet up and orient fast
- Landmark-focused route hits Temple Bar, Grafton Street, St. Stephen’s Green, and Trinity College
- Relaxed 2-hour pace means sightseeing and photography coaching happen at the same time
Why This Dublin Photo Tour Feels Different Than DIY

A good travel photo walk isn’t just about where you go. It’s about how you’re directed while you’re there. In Dublin, that matters because the city is photogenic from almost every angle, but your results depend on timing, posture, and knowing what to aim at.
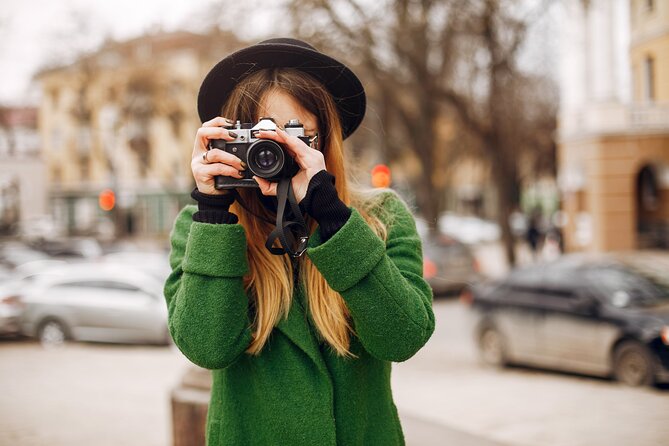
With this experience, you’re not left to figure it out on your phone. You get a photographer with photography tips and pose suggestions, so you can spend less time trying to read the screen and more time actually enjoying the city. I also like that the tour is private. You can talk to the photographer, ask for ideas, and move as a small group rather than waiting for the slowest person at every stop.
The second big win is the photo finish. You don’t just leave with originals that need heavy cleanup. You get a digital gallery of professionally edited images delivered within days. That shifts the value from an evening of fiddling with apps to having polished results you can post with confidence.
The final point that makes it worth considering: the route is built around spots that look good in photos without requiring specialized knowledge. You’re covering the usual Dublin hits, but the photographer helps you turn them into images you’ll actually want to keep.
You can also read our reviews of more photography tours in Dublin

Starting at O’Connell Bridge: An Easy Beginning With Big Photo Payoff

Meeting on O’Connell Bridge is smart. It’s central, recognizable, and practical for a 2-hour experience. If you’ve ever started a short walking day in a place you can’t easily find, you know how much energy that steals. Here, you’re anchored early.
From there, the tour is designed to keep you moving between key scenes without rushing. The photographer will guide you through quick photo moments and short guided segments at major stops. In practical terms, that means you get a blend of fun sightseeing and targeted shooting.
Also, you should know this ends near the start. The activity information says it concludes back at O’Connell Bridge, but the overall description also says it can end at a location of your choice. If you care about the final drop-off, confirm the exact end point when you book, so you’re not stuck figuring it out on the day.
Temple Bar District in Photos: Color, Faces, and Controlled Chaos

Temple Bar is one of those Dublin zones people either love or find too crowded. Either way, it’s unmistakably photogenic. For this part of the walk, you get a focused photo stop plus a guided segment lasting about 25 minutes.
Here’s where the professional coaching pays off. In areas like this, it’s easy to take a great background photo and lose the person in it. The photographer helps you with positioning so you’re visible, not swallowed by the street scene. You’ll also get pose ideas that work in tight spaces, so you’re not stuck with only the classic stand-and-smile shot.
If you’re hoping for nightlife vibes, you’ll likely find more color in doorways, signs, and the general streetscape. If you prefer clean, more elegant photos, the photographer can help you shift angles so you get the charm without making the image look messy.
One practical note: Temple Bar can be busy. A private photo walk helps because you’re not negotiating your spot with a full bus of tour groups. Still, give yourself patience. Your best shots often come from waiting for a clear moment, and that’s exactly the kind of timing guidance a photographer can offer.
Grafton Street: Where You Get Elegant Street Portraits

After Temple Bar, the walk shifts to Grafton Street, another Dublin highlight that works well for photos because it’s a mix of architecture, shopfront energy, and street-level charm.
You’ll have about 25 minutes here for a photo stop plus guided time. What I like about including Grafton Street is that it’s not only about buildings. It’s about how people move through the city. With a photographer at your side, you can create images that feel lived-in rather than posed in front of a landmark.
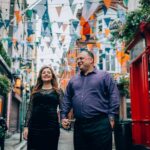
This is also a great section for couples and small groups because it’s easy to frame multiple people without making the image feel cramped. If you’re solo, it can feel easier than you think too. A photographer can guide you into poses that look natural even when you feel like you’re trying too hard.
If your goal is Instagram-ready street photos, this is one of the best places on the route. Just keep in mind that street photography often means you’re adapting to what’s around you—pedestrians, signage, and light. The photographer’s tips reduce the guesswork.
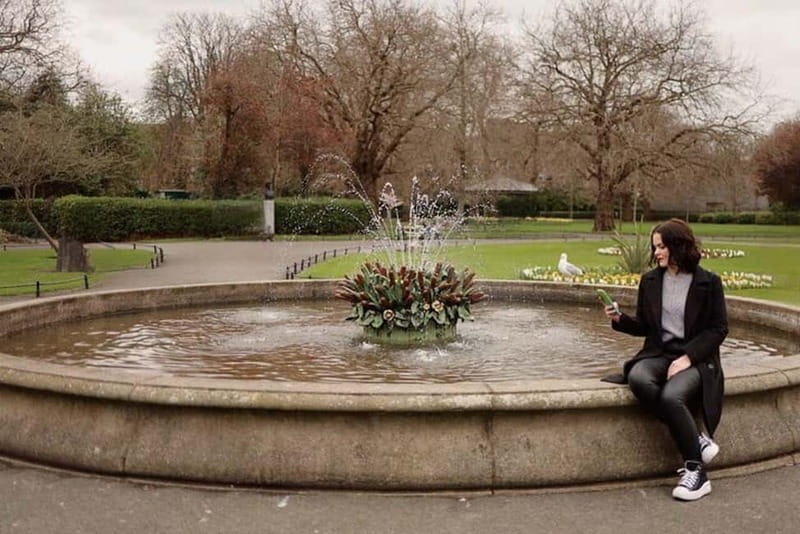
St. Stephen’s Green Park: From Street Energy to Calm Photos
St. Stephen’s Green is a welcome change of pace. It gives you a greener, softer background that helps your photo set feel varied, not repetitive. You’ll spend about 25 minutes here with a photo stop plus a visit.
The park segment is where you can slow down and get photos that look more relaxed. Think natural postures, easy walking shots, and images where the background feels like part of the story rather than just an unavoidable wall or storefront.
This stop is especially helpful if your group wants variety. If Temple Bar and Grafton Street start to feel a little intense, St. Stephen’s Green lets you reset. Even if you’re only here for a short time, you’ll end up with photos that look like a different part of Dublin.
And if you’re traveling with kids or someone who hates staying still for photos, a park can be kinder. The tour still keeps you moving, but the environment supports more candid-feeling shots.


Trinity College Dublin: Classic Dublin in a Clean Frame
Trinity College Dublin is the kind of stop that makes a photography tour click. It looks great in photos, and it gives you a recognizable Dublin landmark with a strong sense of place.
You’ll have about 25 minutes for a photo stop plus visit and guided time. This matters because university buildings and campus spaces can be photographed many ways. A good photographer will help you choose angles that show the landmark clearly while also making the people in your group look intentional.
If you’re hoping for a mix of classic and stylish images, Trinity is a strong bet. The architecture can help your photos look timeless, especially when the photographer guides your positioning and tells you what to do with your hands and stance.
This is also a good point to consider your outfit. You don’t need to dress like you’re filming a movie, but a clean top layer and shoes that you’re comfortable walking in will make the photos feel sharper.
The Poses and Tips You’ll Actually Use Again

This tour isn’t only about taking photos during the walk. It’s about learning a few tricks that help your future attempts with a phone or camera.
Here’s what you can expect in real terms:
- Quick posing guidance so you don’t end up frozen like a mannequin
- Tips on where to stand so you get good separation between you and the background
- Direction on angles and body positioning that make even simple backdrops look better
The goal is to help you feel comfortable in front of the camera. That’s not a small detail. If you’re tense, your face and posture show it immediately. When you’re relaxed, your expressions look natural, and your photos feel more like you.
One more useful point: there’s often a friendly, welcoming tone from the guides. The name Lyvia has come up in feedback as being especially warm and welcoming. That kind of guide energy matters because it makes the session feel easy rather than awkward.
Price and Value: When $180 Makes Sense for a Private Group
The price is $180 per group for up to 8 people, and the tour runs about 2 hours. On the surface, that can sound like a lot if you’re thinking per person. But private photo tours work differently: the cost covers the photographer’s time and the editing turnaround—not just the act of walking.
Here’s the practical way to think about value:
- If you’re traveling as a pair or small group, you can still spread the cost across multiple people.
- If you can fill most of those 8 spots, the per-person value improves quickly.
- You’re paying for coaching plus professionally edited results within days, which saves you time and frustration after the tour.
And remember: the tour is built around high-impact stops. You’re not spending half the time relocating or searching for good angles. You’re using a concentrated route and a professional to get the best shots from it.
If you’re the type who hates fiddling with photos later, the promise of edited images is a big part of the value. You’re buying a smooth end-to-end experience.
What You Get at the End: Edited Photos Within Days
The best part of a photo tour is what happens after you’ve walked away. This one delivers a digital gallery of professionally edited photos within days, which is ideal if you want something ready for posting without waiting weeks.
You shouldn’t expect to get perfect photos directly from your phone. That’s why editing is included. The editing step helps images look consistent in color and tone, and it typically makes people look sharper against the background.
One tip for your planning: treat the photo delivery as something you’ll have in hand soon, but don’t schedule something that must be posted the same day unless you’re okay with timing uncertainty. The stated promise is within days, so you’ll likely have results before your trip ends, but exact timing can vary.
Who This Is For (and Who Might Prefer Something Else)
This photo experience fits best if you want iconic Dublin results without the stress of DIY planning.
It’s a great match for:
- Solo travelers who want photos that don’t rely on a selfie-stick
- Couples who want flattering portraits with a real sense of place
- Families and small groups who want help posing and capturing everyone
It might feel less ideal if:
- Your group has mobility limitations, since it’s not suitable for wheelchair users
- You dislike instruction and prefer wandering without any guidance
- You have only one free hour and need a shorter option
Also, if you’re the photographer in your group, you might enjoy the swap—hand the job to someone else and focus on being in the picture.
Practical Walkthrough of the 2-Hour Flow
To make your expectations match reality, here’s how the timing feels:
- Start at O’Connell Bridge
- Temple Bar photo stop and guided time (~25 minutes)
- Grafton Street photo stop and guided time (~25 minutes)
- St. Stephen’s Green photo stop and visit (~25 minutes)
- Trinity College Dublin photo stop and visit/guided time (~25 minutes)
- Return to the O’Connell Bridge area
That’s a tight loop, but it works because each stop has a defined purpose. You’re not stuck in one location forever, and you’re not rushing through places without time to breathe.
Should You Book This Dublin Photo Experience?
If you want Dublin photos that look intentional, not accidental, I’d lean yes. The mix of a professional photographer, pose guidance, and a professionally edited digital gallery within days is the winning formula, especially when you only have a short window in the city.
Book it if you’re traveling with someone you want in the photos, or if you know you’ll regret not having stronger images later. It’s also a smart choice on days when the weather is unpredictable, because the photographer can help you find workable angles quickly.
Skip it if mobility is an issue, or if you’d rather spend the time exploring on your own with zero instruction. And if you care about where you finish, confirm the exact end point so your last minutes in Dublin go the way you want.
If you do book, come with one small idea of what you want: classic landmark shots, street portraits, or park-and-campus vibes. Then let the photographer handle the technical part. That’s how you get photos that actually feel like your trip.
FAQ
Where does the tour start?
The tour starts at O’Connell Bridge in Dublin. You’ll meet the photographer holding a sign with the tour name.
How long does the photography experience last?
It lasts about 2 hours.
How many people are in the group?
This is a private group experience for up to 8 people.
What locations will we visit?
You’ll cover photo stops and guided time around Temple Bar, Grafton Street, St. Stephen’s Green, and Trinity College Dublin, with the tour beginning and ending at O’Connell Bridge.
What happens after the tour with the photos?
You receive a digital gallery of professionally edited photos within days, designed for sharing on social media.
What language is the guide?
The live tour guide speaks English.
Is it wheelchair accessible?
It is not suitable for wheelchair users.
Where does the tour end?
It ends back at O’Connell Bridge, but the description also notes the tour may conclude at a location of your choice. Check the exact end point when booking.